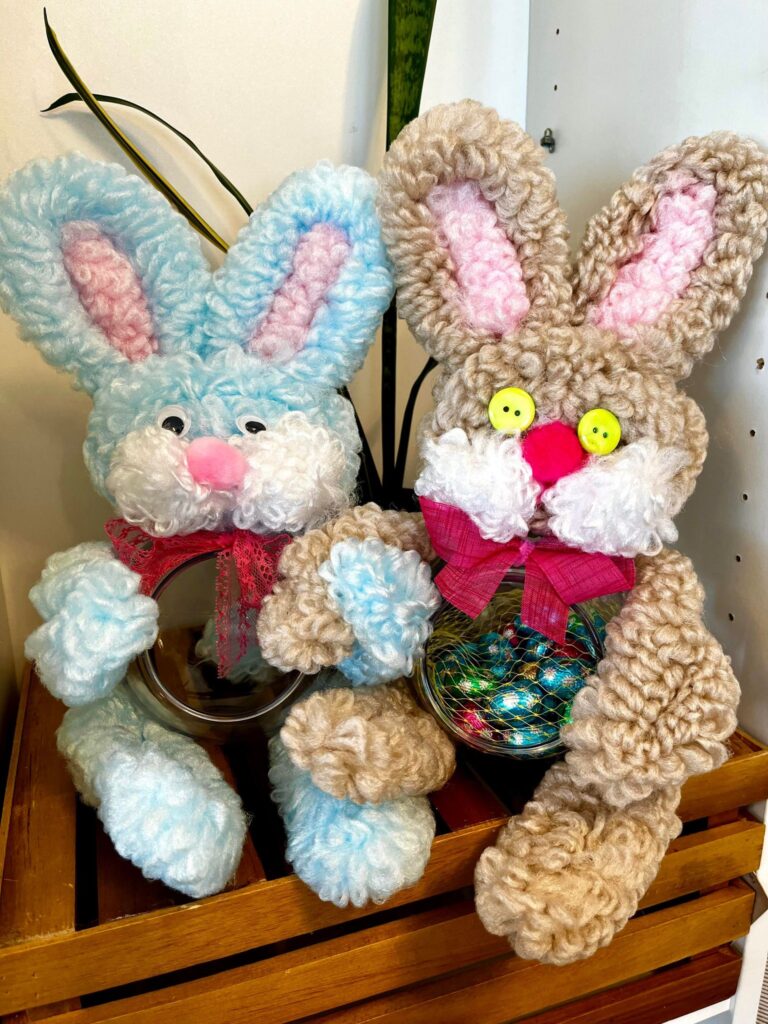
Aren’t these little bunny candy containers adorable! We were inspired by this page and created our slightly different version of them.
Are you looking for a fun craft to do with your kids for Easter? We have a few kits ready to go with all the needed material:
- Loopy chenille pieces (already cut in the various lengths needed to realize the project)
- Styrofoam ball for the head form
- Pink pompom for the nose
- A pair of Google eyes (which you can replace by cute buttons if you prefer)
- A plastic ball with front opening for the body form (and for holding Easter chocolate and treats)
- A piece of ribbon to make the bow
All you need to supply to complete the craft is the following:
- A glue gun with some glue sticks
- Some yummy candies to fill your bunny with!
Obviously you will have to handle the hot glue if working on this project with a young child.
The steps to make this are simple:
- You will start with the styrofoam ball and your longest piece of chenile. Put some hot glue at one of the tips of the chenille strand and poke it in the styrofoam ball. When the glue has set, start wrapping the piece of chenille around the styrofoam ball so it’s covered all over by the chenille. Glue the last end unto the styrofoam ball so it will stay in place around the ball.
- Take two 9 in. pieces of chenille and the two 3 in. pink pieces of chenille. These will be for the bunny’s ears.
- Fold one of the 9 in. piece in two; lightly glue a piece of pink chenille on the inside of the folded bigger piece. Glue the two ears on top of the bunny’s head with some hot glue. Hold until the glue sets and the ears and firmly secured to the head.
- Now put some glue on the small handle at the top of the plastic ball. Insert the handle right through the styrofoam ball, under the head.
- Take the two other 9 in. pieces of chenille. Fold them in half. Glue them on each side of the ball to create your bunny’s front paws.
- Using the two 11 in. pieces of chenille, fold them in two and glue them on each side of the ball towards the bottom, so they touch the surface of the table when the bunny is sitting upright. These will be the bunny’s hind legs.
- Take two small 3 in. pieces of white chenille and shape them in small loops that you will glue one beside the other in the middle of the bunny’s face. Then glue the pink pompom between the two loops, to make the nose and snout of the bunny.
- Glue the last 3 in. piece of chenille in a little ball at the back of the bunny to make his tail!
- Glue the two eyes right above the snout. You can replace the googly eyes by other cool stuff you have at home, buttons, craft gems, etc.
- Give it the finishing touch by making a nice bow out of the piece of ribbon and glue it right under the head, above the opening of the plastic ball. Your bunny is completed!
Included here is a quick video demonstration of the process just described.
